How to Reset and Flush DNS Cache in macOS Ventura 13 [Fixed]

macos Venturar flush dns

Are you facing an internet issue in macOS Ventura and tried many solutions to fix it? Some browsers and devices store website location data in your system for quicker access to the DNS Cache. DNS Cache needs to be flushed to remove stored website location details. Here are some of the common ways to flush your DNS cache on macOS Ventura

macos Venturar flush dns

DNS, or a Domain Name System, is primarily what resolves website names into their respective IP addresses. So, if you are encountering an issue on your Mac where the name server is not resolving properly, or if you want a DNS change to be noticed by your system, you might have to reset and flush the DNS cache in macOS Ventura. This can also come in handy if you have made edits to your /etc/hosts file, and you want the changes to register without having to reboot your Mac. So, if you want to reset and flush the DNS cache on your macOS Ventura, follow the below steps to know how to do it.

Reset and Flush/Clear DNS Cache in macOS Ventura

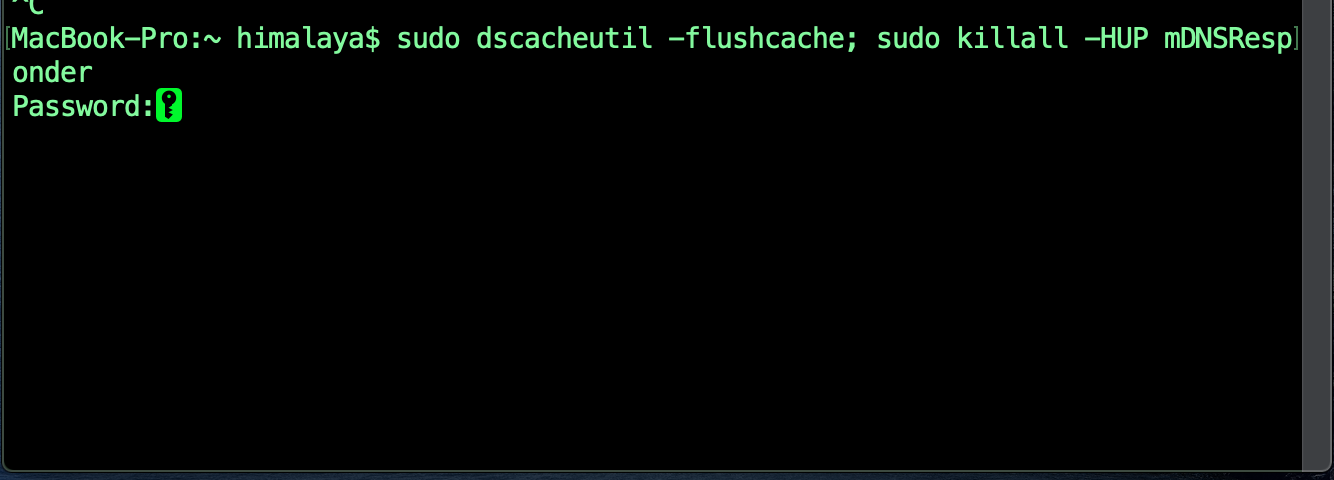
The process to reset and flush or clear the DNS cache in macOS Ventura is actually very easy. All it requires is for you to enter one command in the Terminal, and you’re done. Well, technically, it’s two commands in one line. If you want to flush the DNS cache on a Mac, simply follow the steps below:

1. Launch Terminal, and type the below command first.

sudo dscacheutil -flushcache; sudo killall -HUP mDNSResponder

2. Then it will ask to enter a password. Enter your Mac login password and hit Enter.

3. If everything goes right then you have successfully reset and flushed the DNS cache on macOS Ventura. If you were encountering any issues with name servers, and such, they should now get resolved. You can try and do a “dig“, or “nslookup” on a website you want, to see if your DNS issues have been resolved.

See also: MACOS VENTURA WIFI NOT WORKING No Internet

Reset and Flush DNS Cache DNS Issues in Ventura [Fixed]

You can reset and clear the DNS cache in macOS Ventura to fix most DNS issues that you might be facing. The method mentioned in the article works for Mac OS Ventura 12, and even on macOS Ventura. If you face any issues with the commands I mentioned, feel free to let me know in the comments section down below.

MACOS VENTURA WIFI NOT WORKING NO Internet

As you will probably already know there dozens of different reasons as to why your Wi-Fi speed could be delayed on Ventura OS. It can be down to your choice of browser, where your router might be located in your house or your distance away from the said router or maybe issues with how many programs you have open that are simultaneously using the internet. Here is some troubleshooting you can carry out.

The first port of call in this instance is to restart your router. Find out where your router is located in your office or home and simply switch it off using the reset button, leave it off for around 10 seconds before switching it back on. It will take approximately 5 minutes for the connection to come back up and look for any improvement.

Ventura

1. Fix Ventura os Slow Wifi or NO internet issue

Next, you’ll want to check your DNS Settings. To do this:
1. Go to the Apple Menu in the top left of your screen.
2. Select “System Preferences” and Select “Network” and then to “Wi-Fi”.
3. Click “Advanced” button, in the next window select the DNS option.
4. Click the [+] button to add a new DNS network.
5. Type in the IP addresses of 8.8.8.8 and 8.8.4.4, respectively. This means that it will first look for googles servers, which will speed up your browsing experience as it is statistically the fastest DNS server.

2. Remove Network and ReConnect

If the problem persist your next step is to remove the WiFi network that you have issues with an reconnect to it later on:

  • Open System Settings -> Network.
  • Go to Advanced WiFi settings.
  • Click the WiFi network in question and remove it.
  • Click the WiFi icon in the menu bar and reconnect to the previously removed network. You should find it in the Other Networks section.

Bottom Line

Hopefully, this guide will have given you all the answers you could have wanted should you have found yourself feeling frustrated at your system running slow after updating to the latest macOS 13, namely Ventura. This guide has also run you through all the possible reasons and solutions should you be having these issues and once resolved, you should be able to use the Ventura OS at an optimal speed.